Lesson 2: Guide Ellen out of harm’s way!
Checked with version: 2018.2.1 - Difficulty: Beginner
In Lesson 2, you will learn how to add a moving platform and determine which direction it moves. The game-hero, Ellen, can then jump on the platform to get across gaps. You’ll also learn how to trigger the platform by having Ellen shoot a switch. Yee haw!
Set yourself up for success by setting aside at least 1 hour to complete this lesson. If you get stuck, seek out answers and help in our moderated 2D Game Kit forum.
Adding a moving platform
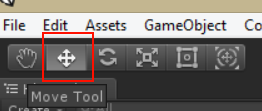
Before you begin manipulating GameObjects in the Scene View, select the Move Tool at the top left of the editor (you can also select the Move Tool by pressing W on your keyboard).
Now let’s add a moving platform to your level:
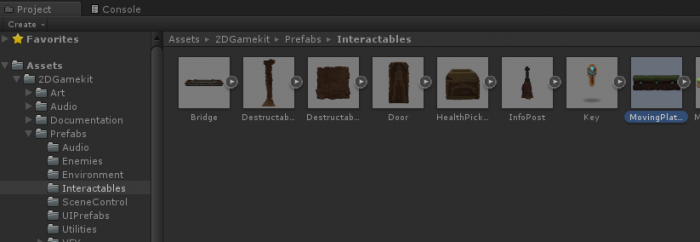
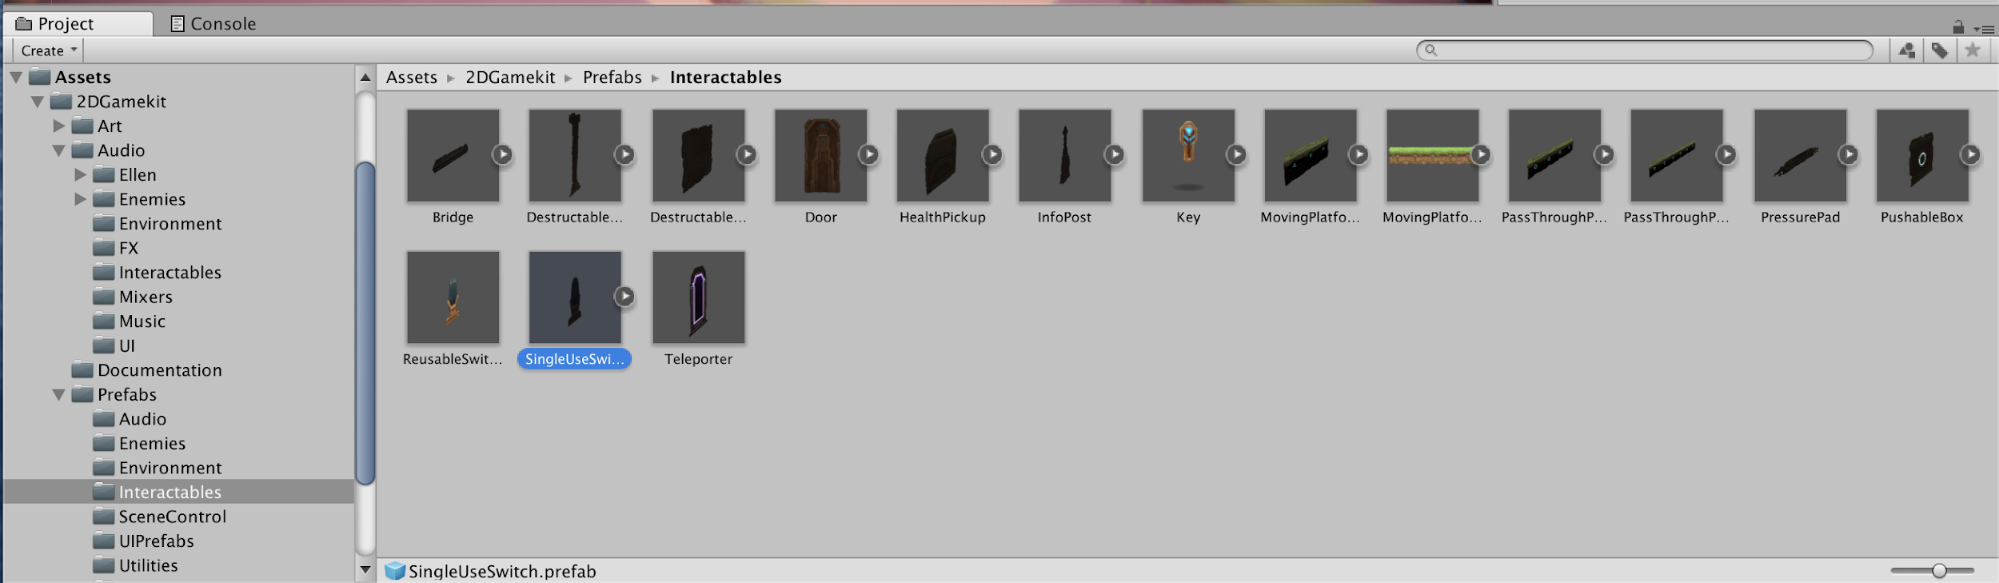
- Navigate to the Project Window. Remember, the Project Window (also referred to as the Project view) is the gray window located directly below your Scene
- Go to Assets > 2DGameKit > Prefabs > Interactables
- Left click and drag the MovingPlatform into the Scene View
- Make sure the MovingPlatform is selected in the Hierarchy
- Press W to use the Move Tool
Use the Move Tool on the MovingPlatform to put it wherever you want in your level.
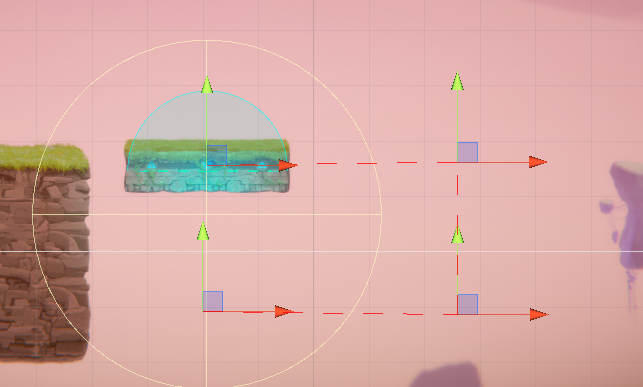
When you select the MovingPlatform, a red dotted line appears, with a Move Tool gizmo at the end of it (the red arrow). This indicates the path the platform will take when the game is playing.
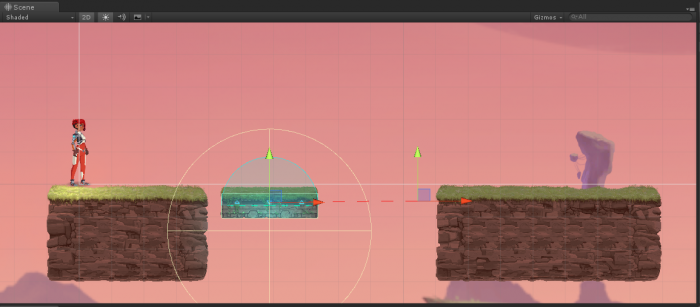
- Use the Move Tool gizmo at the end of the red dotted line to indicate the path you would like the platform to take
To preview the path the MovingPlatform will take, select the MovingPlatform in the Hierarchy window and follow these steps:
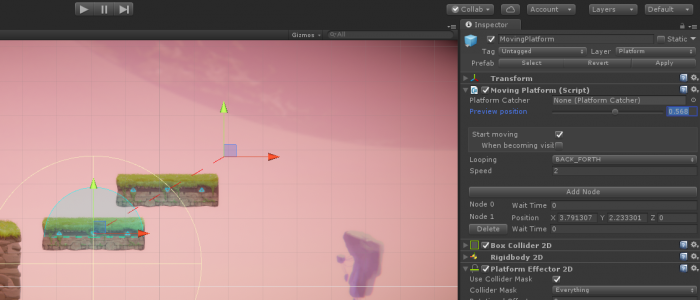
- Navigate to the Inspector window
- In the Moving Platform Component, find the Preview Position slider
- Click and drag to scrub and see where the MovingPlatform will go
- Let’s make the path of this platform a little more complex by making it loop in a square. You can do this by adding Nodes
Nodes are additional navigation points for the Moving Platform Component.
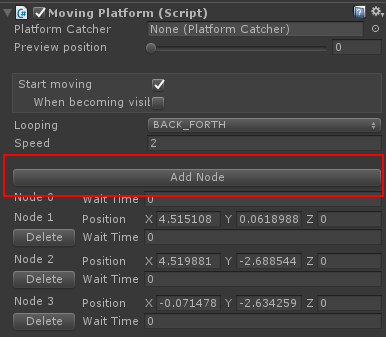
- In the Inspector locate the Moving Platform Component
- Click Add Node twice. (Hypothetically you can add as many as you like, and delete unwanted nodes by selecting Delete.)
Clicking it twice adds two additional red dotted lines and gizmos (arrows). Note: You might need to zoom out in order to see them. To zoom in or out, hold Alt, and right-click and drag to zoom the Scene View. On Mac you can also hold Control, and left-click and drag instead. Once you've located the extra gizmos, use the gizmos to position your extra Nodes into a square shape.
You’ll notice that there isn’t a path going from the last node back to beginning. If you press Play now, it will stop at the last point, go backwards on the path, and start again. Try it and see!
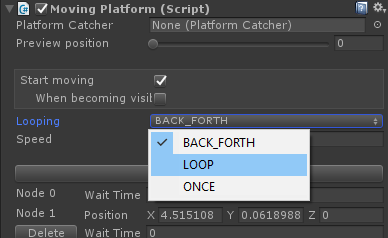
You can change the settings of the platform to make it form a loop:
- Make sure you've exited Play mode (remember, any changes made in Play mode won't save) and then select MovingPlatform in the Hierarchy (do this every time you want to manipulate the MovingPlatform, or anything else in the Hierarchy)
- In the Moving Platform Component find the Looping option
- Click the dropdown that says BACK_FORTH
- Select Loop
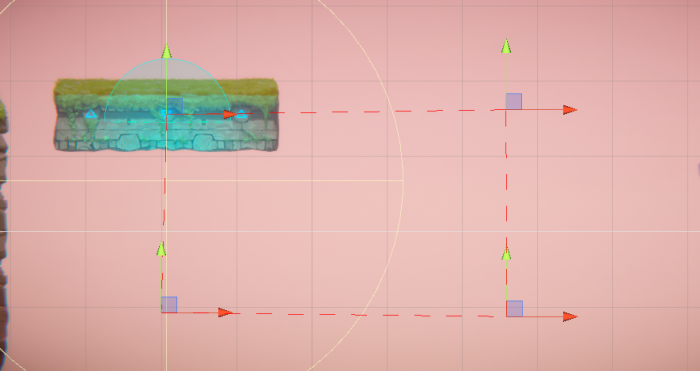
This forms a loop in the gizmos, and the platform takes this path.
Note: The preview slider does not preview a complete loop, so you need to press Play to see it fully in action.
You can change the speed of the MovingPlatform by changing the "2" in the Speed field to something higher like "3".
Save your Scene! In the menu select File > Save Scene or press Ctrl + S (Windows) or Cmd + S (Mac)
Now continue below to learn how to activate the moving platform by shooting a switch.
Supporting live training video #1
Lesson 2a: Adding moving platforms
Controlling platforms with switches
Try making the platform triggered by a switch instead of having it automatically follow along its path during gameplay:
- Go the Interactables folder in the Prefabs folder and find SingleUseSwitch. This switch can only be shot once in the game.
- Drag and drop the Switch onto your scene. If placed on the ground, you will have to crouch (S) and shoot (O) to trigger the Switch. Enter Play mode and give it a try!
To make shooting the Switch trigger the Platform:
- Exit Play mode and select SingleUseSwitch in the Hierarchy.
- Let's inspect it. Scroll down in the Inspector to find Interact on Trigger 2D (Script).
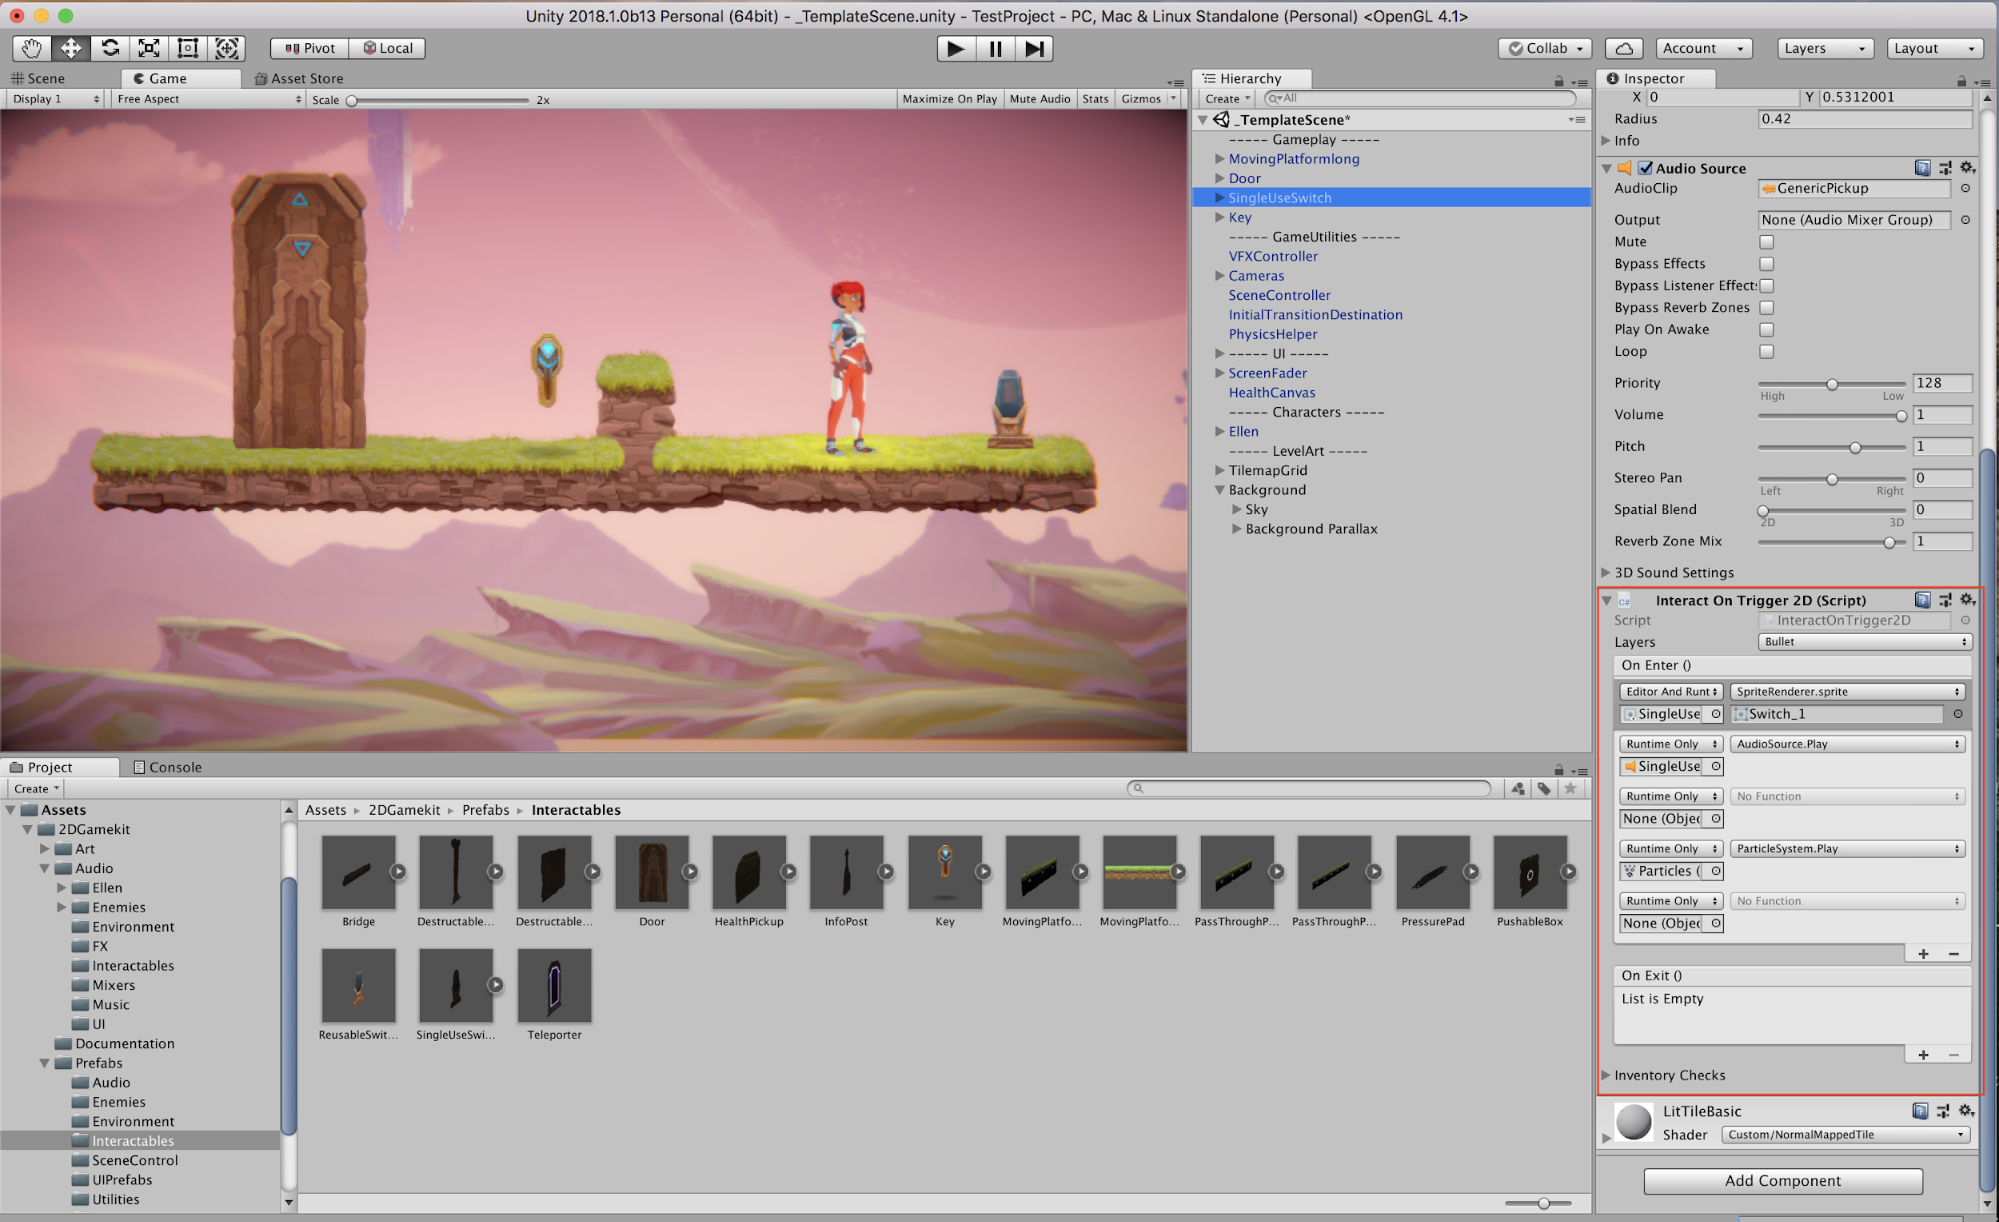
Here, you can see the SingleUseSwitch plays a sound and triggers some particles, but it also has some empty slots for you to add your own options. See where it says None (Object)? You're going to input the MovingPlatform prefab there to set it up to be triggered by the Switch:
- Click and drag the MovingPlatform from the Hierarchy into one of the empty slots None (Object) in the Interact On Trigger 2D component. Be sure to click and drag, and NOT just click without dragging, otherwise you will select the MovingPlatform fully and it will then be what the Inspector shows.
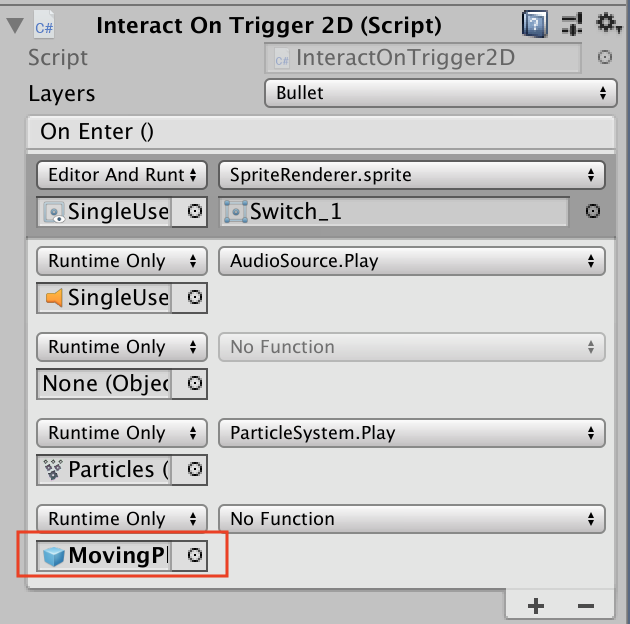
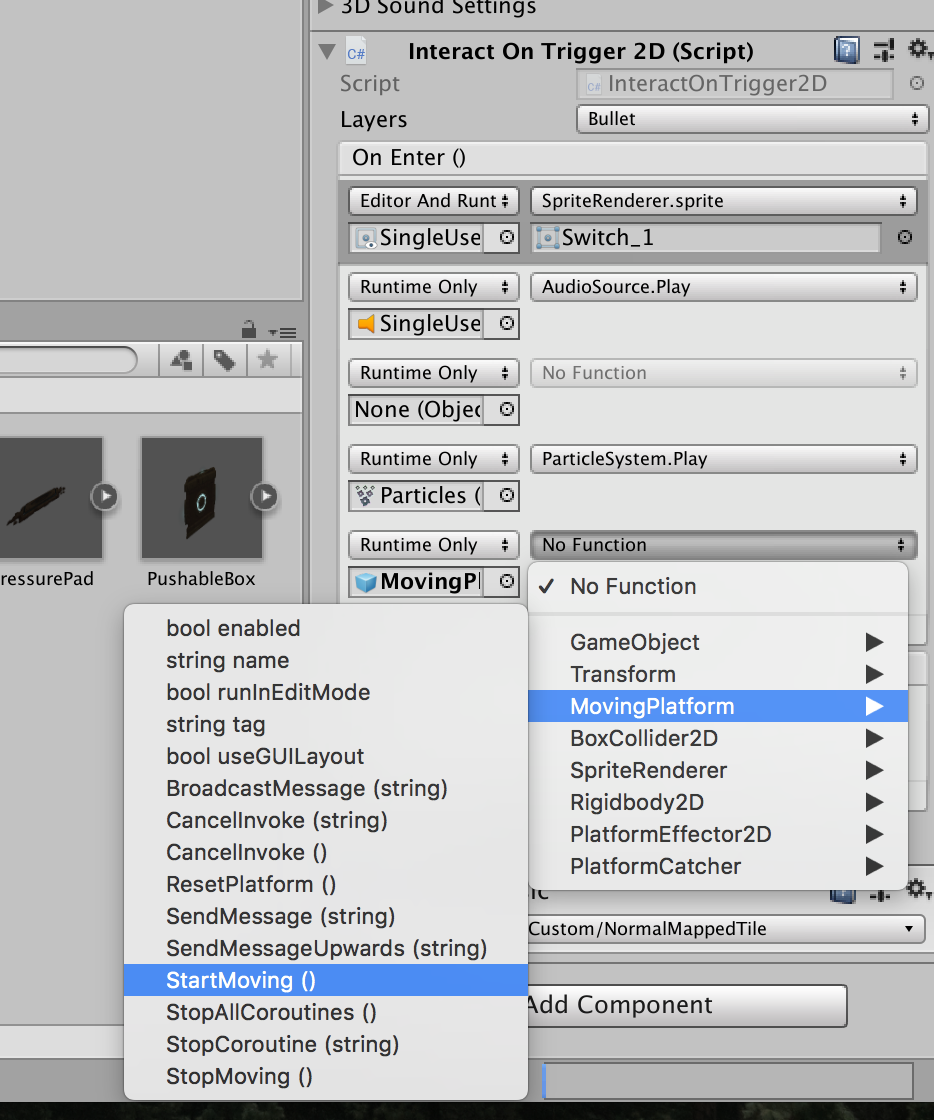
- Select the NoFunction dropdown to the right and select MovingPlatform > StartMoving ()
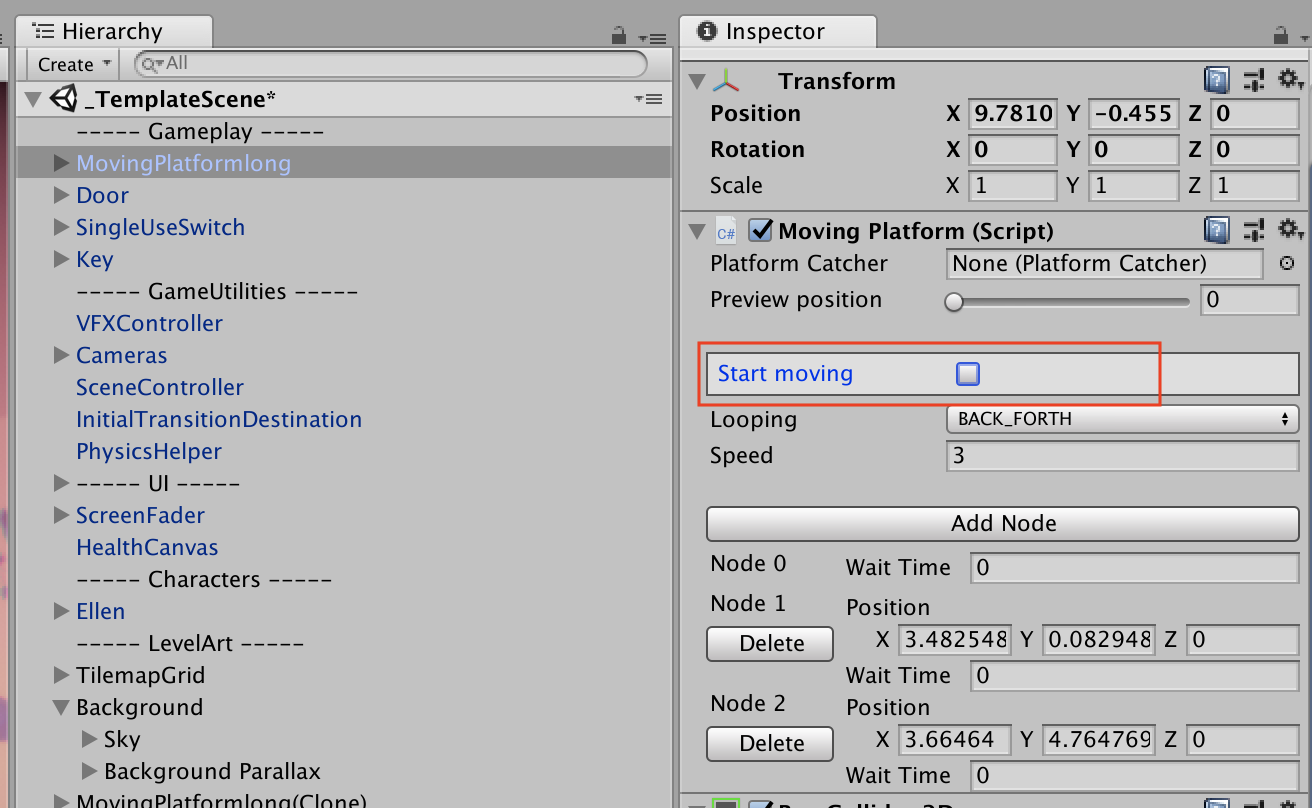
Then you'll need to select the MovingPlatform in the Hierarchy and in the Moving Platform (Script) component, uncheck the Start moving box so that the platform does not start moving automatically.
Now that you've set up the SingleUseSwitch as your trigger, when entering Play mode, your platform should now move when you shoot the switch. Give it a shot! (Pun intended.)
And of course, remember to save your Scene! In the menu select File > Save Scene or press Ctrl + S (Windows) or Cmd + S (Mac)
When you complete Lesson 2, check it off below!
Supporting live training video #2
Lesson 2b: Controlling platforms with switches